When we first arrived at the farm in 2012, we knew we had some Kiwis growing on a small patch of our land. Having not been pruned for years, these had gone "feral" mixing with Wild Rose bushes, Wild Grapes and a variety of saplings, from Sumac to Mulberry.
Almost 2 years ago now we decided to attempt to tame these plants and enjoy their fruits. We experimented with pruning and trellises. We effectively tackled two rows of plants with about a dozen rows having been identified in the brush.
With two growing seasons under our belts, we now have a better handle on what we did right and what could have been improved. So this year we decided to at least free up another two rows... if not more. So along with our other tasks on the farm, we have been dedicating every morning to the Kiwis.
The objective is to have clean rows of trellised and pruned Kiwis from what is now effectively thick bush.
 |
| The objective is to get this..... |
 |
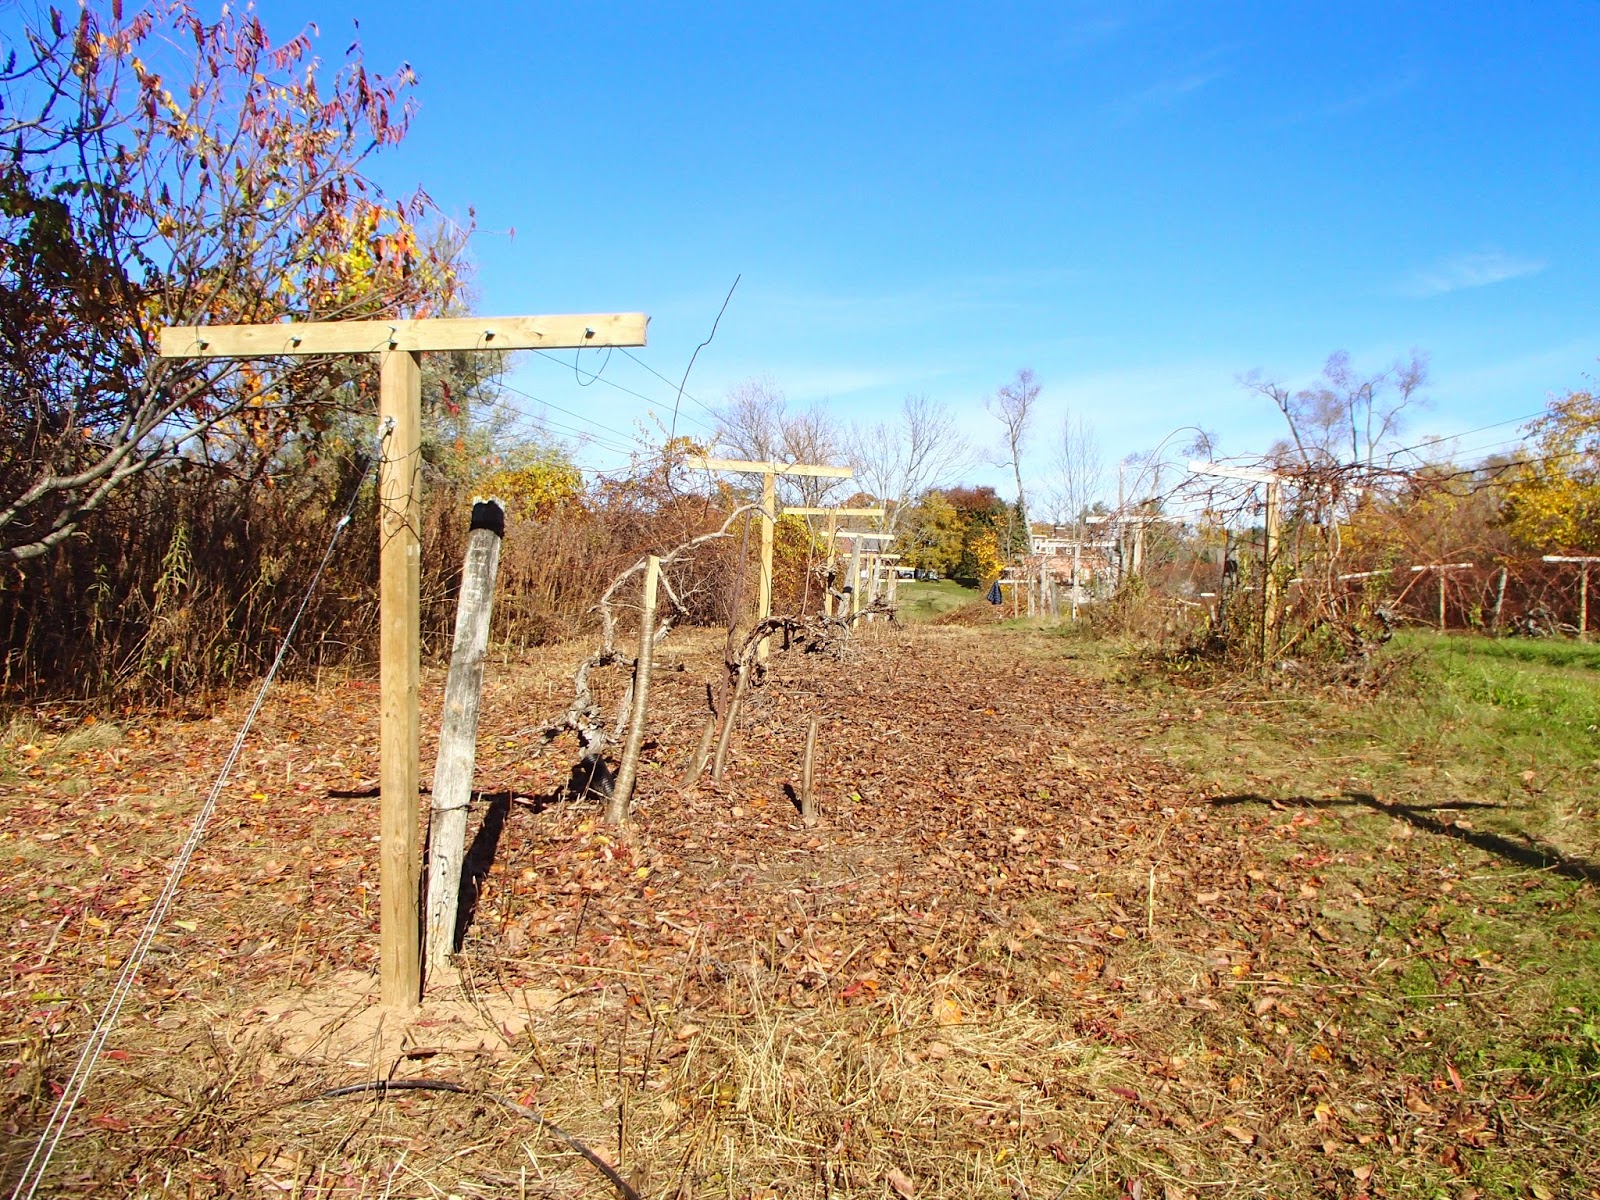
| ....from this! |
Based on our past experience, we've learned that the best way to tackle this mess is to start from the bottom. It's almost like giving a hair cut to something that looks like Cousin It! We were somewhat shy to do too much cutting the first year; we now know that we can be quite aggressive with these plants. In fact, once on trellises, the vines can be pruned twice a year.
Based on out first row of trellises we've also learned that bringing a "bush" down to two mature vines will ensure fruit production for the following year. Since our trellises run from North to South, we send one vine North and the other South on one of our lines.
How we prune this mess has also come down to an art. There is very little and next to no information on how to prune "feral" Kiwis. So we have developed our own method.
We cut back each vine in a piecemeal manner, working our way up the vine and cutting at each junction. The objective is to get a healthy vine with at least two years of growth that has its start close to the original "trunk".
 |
| Working our way to two vines. |
The most important thing to note is the colour of the wood. New vines will be light brown. In subsequent years, they will turn dark brown then grey. The much older portion of the vine will look dead with the outer bark flaking away. You should not be fooled by this as they will be very much alive. The vines that are actually dead will pull away easily like any other dead wood.
 |
| Colour differences with the age of the vine |
 |
| What looks dead is actually very much alive |
 |
| The final objective: two vines with 3 years of growth, starting close to the main root. |
It's easy to see that this clean up of the vines is the most time consuming part of the process. The next step is rather easy: building and setting up the trellises.
Here again, we've learned a few things from our past experience. First, horizontal trellises work very well. They allow you to tame the growth of the vines while making Kiwi fruits easier to find and to harvest.
In fact, while clearing our first row this year, we discovered a lot of fruit still ripening. We would never have been able to find them in their current state. This time of year, the fruits are slightly wrinkled and really at their best (they make for a great sweet snack while working on them).
 |
| They wont last much longer, but the Kiwis are at their best this time of year. |
We found that the best way to mount the cross bars on the main post is to cut the 4x4 down 2 inches and to chisel away the width of the 2x4 (creating an L-shaped groove).
 |
| Chiseling away the end of a 4x4 post |
 |
| Drilling away at the guiding wholes for both center cable and mounting bolt |
The last step to prepare our trellis is to drill the other cable guide holes in the cross bar. These are one foot apart and in the center of the bar, resulting in a total of 5 cable holes.
It's now time to install the trellis. Technically the posts should be 15 feet apart and so should the vines. We basically have to make due with what has been planted. Although the rows seem to be 15 feet apart, this is definitely not the case between the vines of each row. We have some that are much closer together; we also have some rows with gaping holes.
Since we are not prepared to uproot a well established vine, we've decided to work around this when positioning our trellises. We've also discovered a significant amount of new vines. It seems that the Kiwis have self propagated in many places. They do this almost like a Grape vine would. This provides us with new vines to transplant where we have gaps in our rows.
 |
| Small field of new growth ready for transplant |
 |
| Drilling a post hole |
The posts are simply dropped into the hole and back-filled with sand. We find that they hold quite well based on our first installation.
The last step is to mount the cross bars and install the cabling. The cables we use are made of a Polyamide resin. We find this to be much easier to work with than metal. In fact, we've adopted this material for all of our trellising needs around the farm. It maintains tension very well, regardless of temperature and it is very easy to install.
To obtain tension on the lines, we did change a few things. First, we drilled our end post 1 foot below the top to install an eye bolt. On the ground, we installed a 24 inch trellis anchor at a distance equivalent to the height of the eye bolt (giving us a 45 degree angle on the main tension cable). We used standard trellis gripples and tensioning cables to complete the installation at the two end posts.
 |
| End post tension cable |
 |
| Original vice grip installation |
 |
| New end post tensioning gripples |
 |
| One cleaned out row leaves a mess of cuttings |
The weather has turned cold and of course we've already had our first snow fall. In the dome, we're actually still harvesting heirloom tomatoes and some plants are still flowering. The Kale is also doing rather well. We're now thinking of planting some cold weather crops to see how they will do over the coming months.
 |
| Still producing Tomatoes in our unheated greenhouse dome |
No comments:
Post a Comment