To view the latest from Ridge Berry Farm visit our new blog and site!
As we spend most of our Winter days experimenting with our menu, cooking and baking, we promised that we would share some of our more successful recipes.
This week we decided to share our bread making recipe. Although bread is commercially cheap, good bread is hard to come by and there is actually nothing more satisfying than making this culinary staple at home.
Our preferred method is a cold fermented dough. Although it takes time, we consistently produce a beautiful golden and crisp crust around a light spongy bread....just about as close as we can come to a European artisanal bread without having the same raw ingredients.
In fact, there are few ingredients to this recipe (it's all in the process):
- 450 gm hard flour
- about 300 ml water
- 6 gm deactivated yeast
- 6 gm sugar
- 8 gm salt
First we begin by activating our yeast. We combine it with some lukewarm water and the sugar, and let it sit for some twenty minutes. You will know the yeast is ready when bubbling occurs on the surface.
 |
| The yeast is alive and ready! |
If there are any changes we will likely make to the recipe, it will be at this point. Ultimately we would like to work with live yeast. We strongly believe that the yeast makes a substantial difference to the taste of bread and in a lot of cases, we believe it is the most important ingredient that distinguishes our north American bread from the European artisanal breads.
The next step is to combine the salt and flour into a mixing bowl. We use hard flour because it has a higher Gluten content. Gluten is a Wheat protein that helps bind the flour when processed.
To make our dough, we use a small Kitchen Aid mixer with a hook attachment. Once the salt and flour are mixed, we add the yeast and slowly introduce the water.
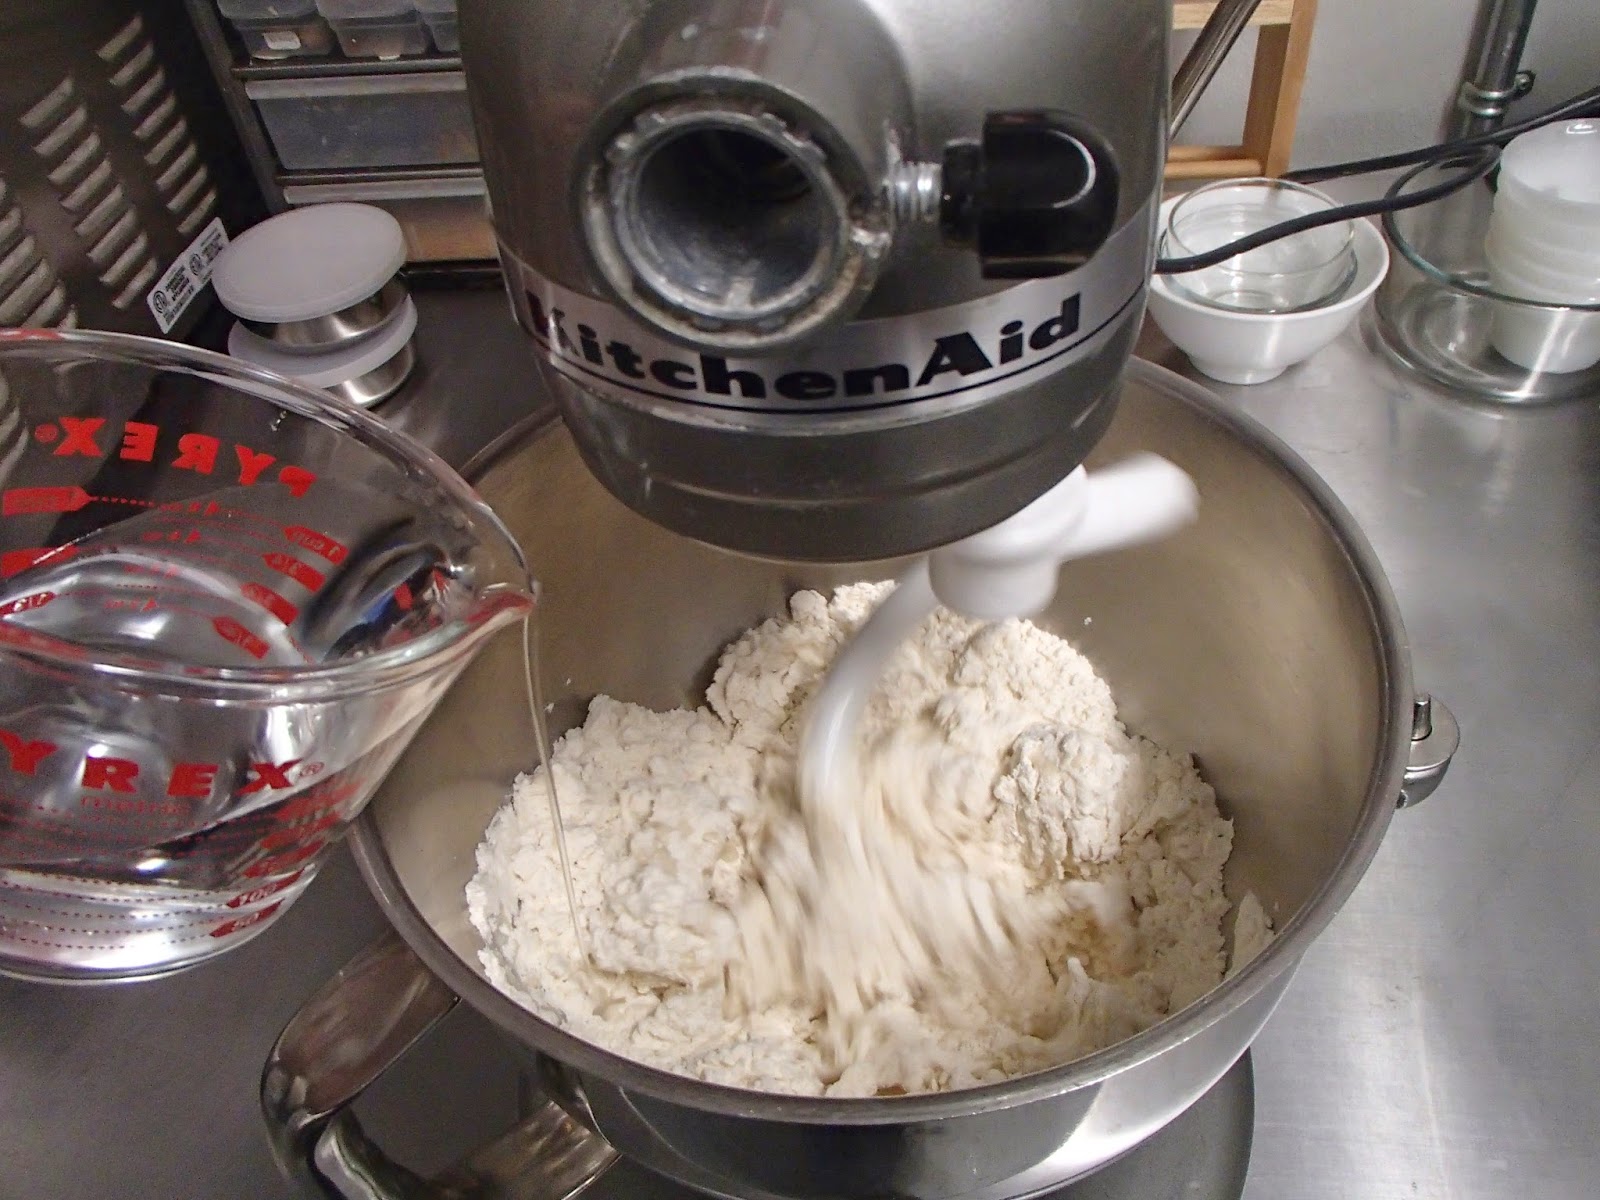 |
| Adding water to our yeast and dry mix. |
This is a critical step. Depending on the humidity in the environment and the amount of water used to activate our yeast, the actual volume of water added can vary. The objective is to have a dough which is not too wet or not too dry either. After a few trials, we've determined that we can do this by eye and touch. We end up waiting for the dough to form in a nice ball around the hook of the mixer.
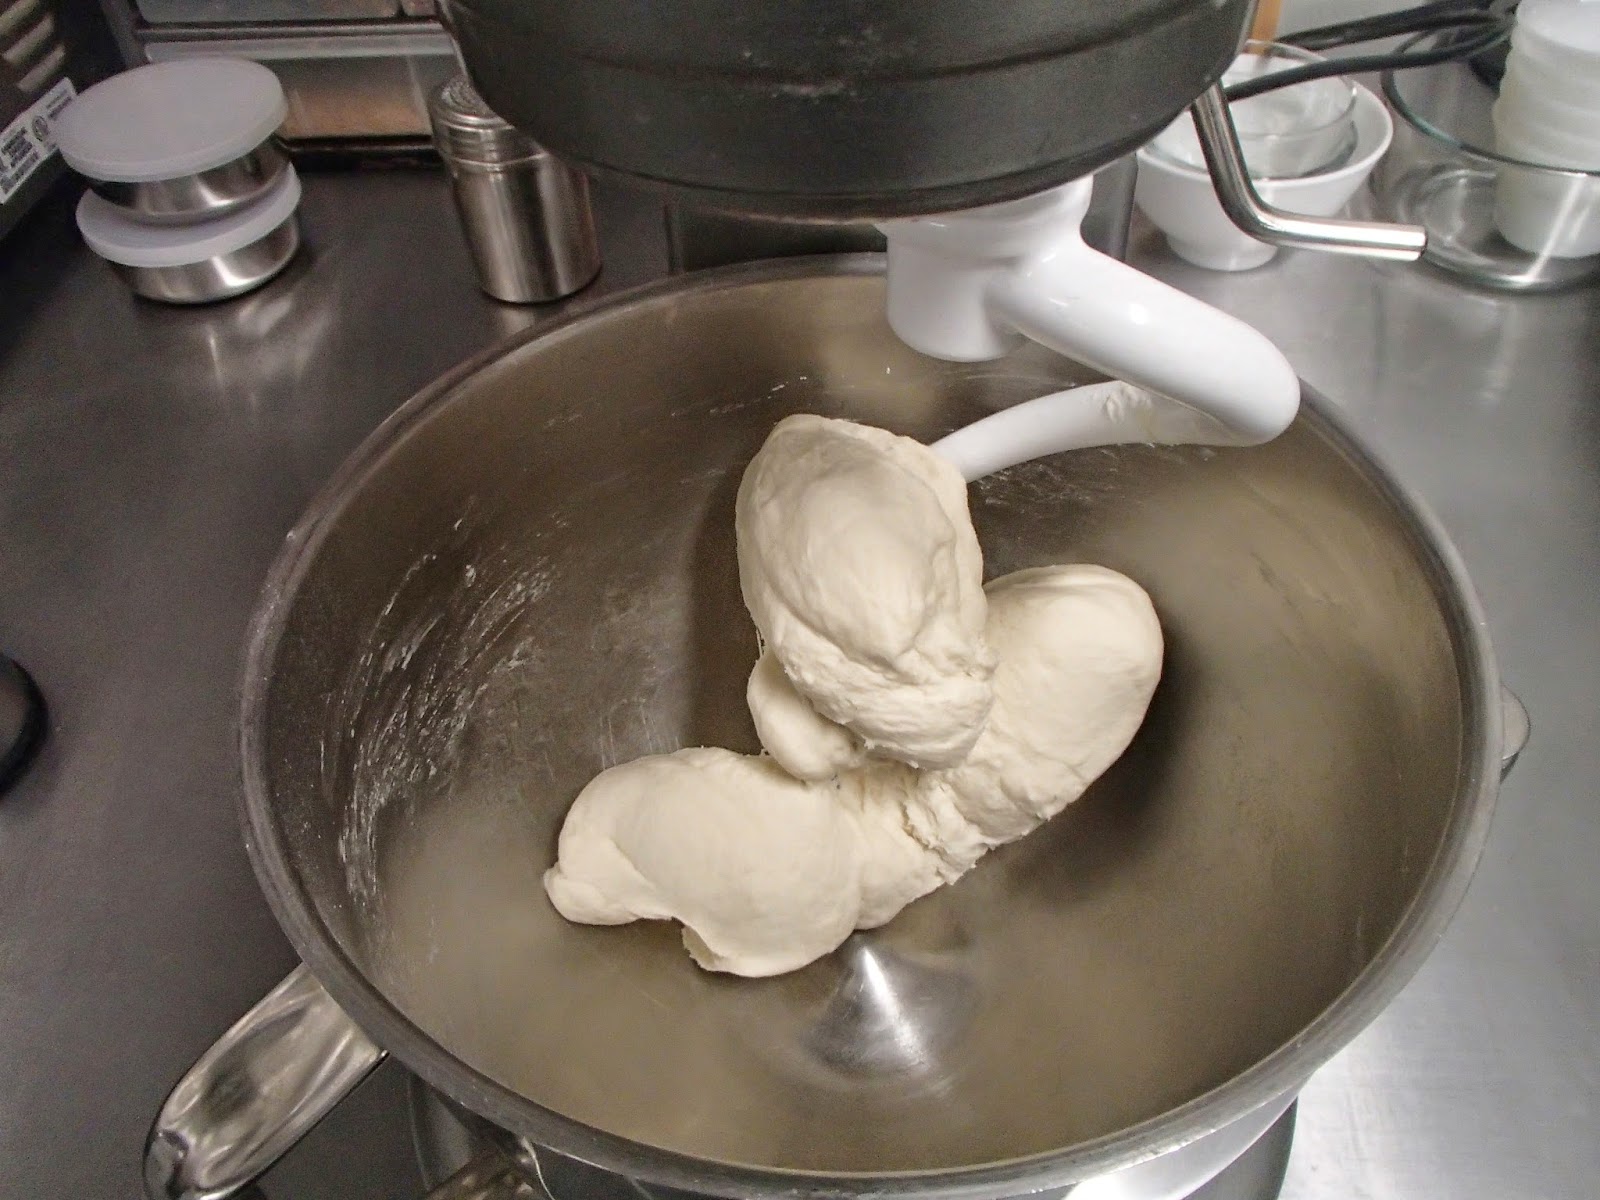 |
| The dough is just about ready to pull from the mixer. |
At this point, we prepare an oiled bowl, place our dough in it and let it rise over the period of an hour. In this time frame, it will relax and almost double in size.
 |
| Our initial dough from the mixer. |
 |
| After an hour it is almost double in size. |
At this hour of resting, we take our dough and place it on a floured surface. We deflate it (by effectively punching it with our knuckles).
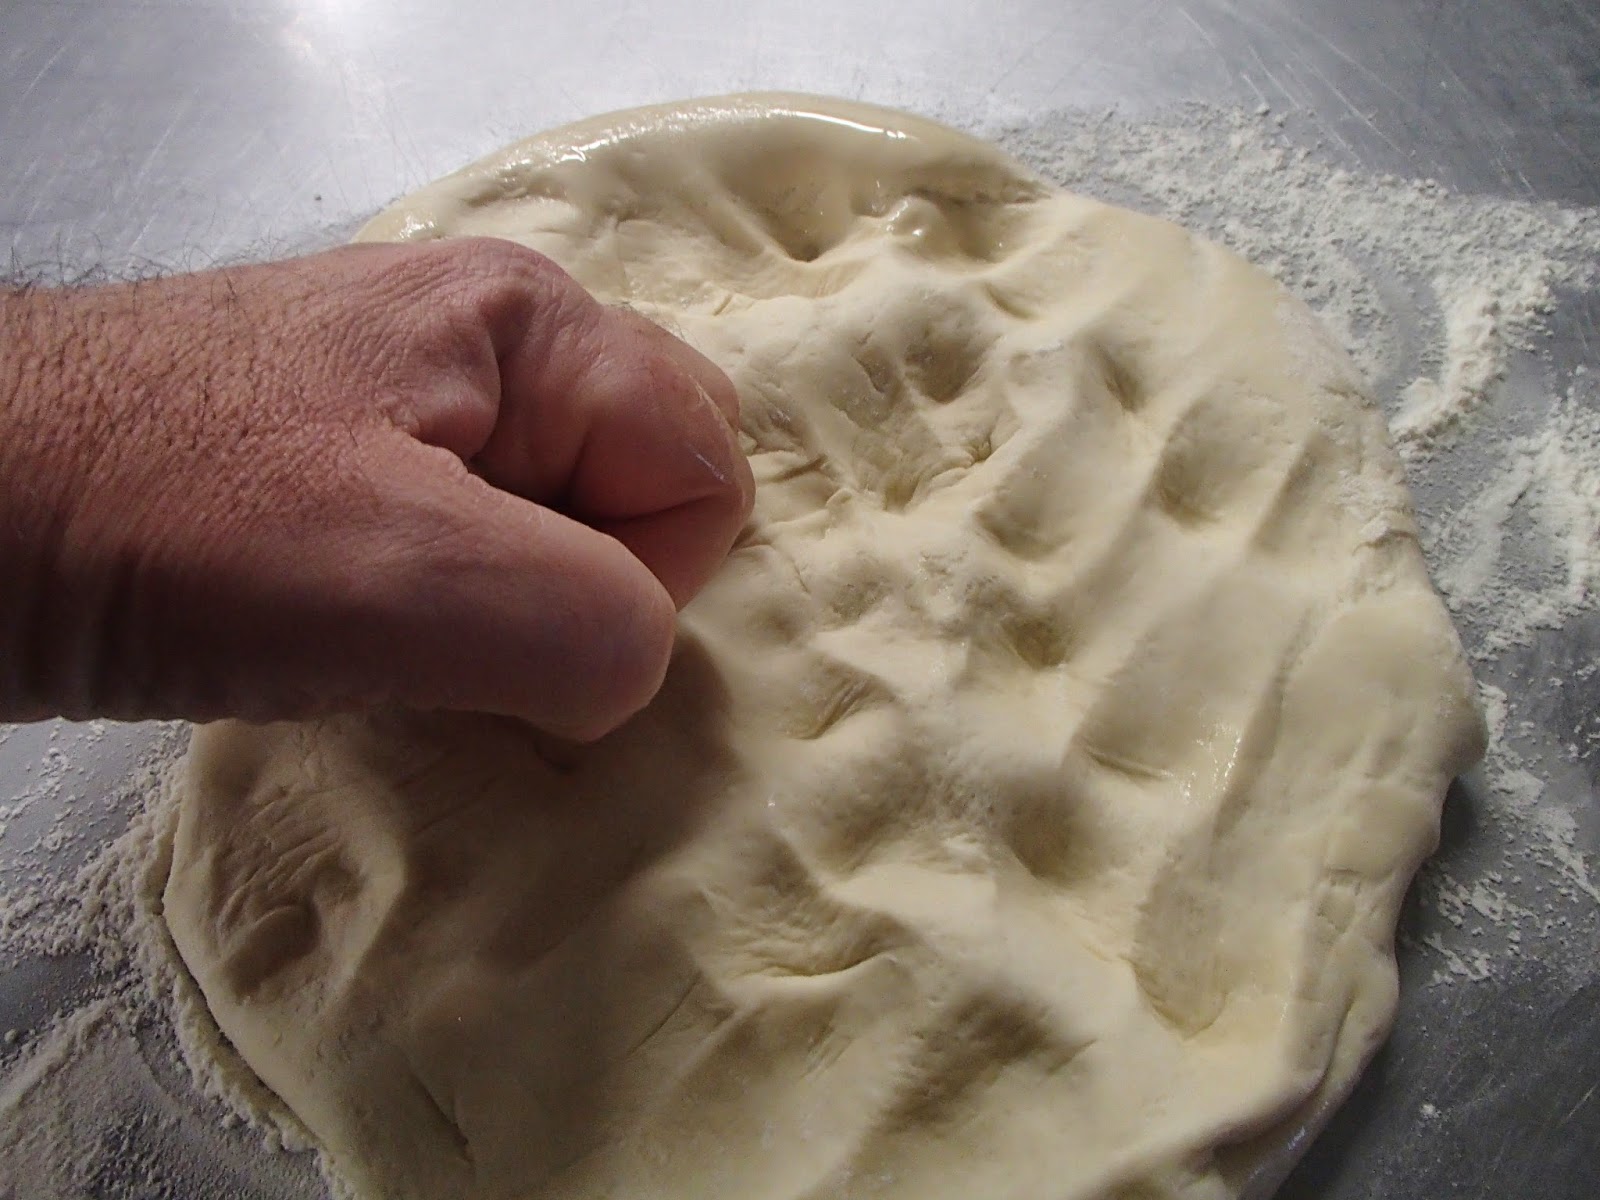 |
| Deflating the dough. |
We then fold our flattened dough four times and return it into a ball to bring it back into the original bowl.
The bowl is covered and the dough is set to rise again at room temperature for an hour. We then place the entire thing in a refrigerator for at least 14 hours.
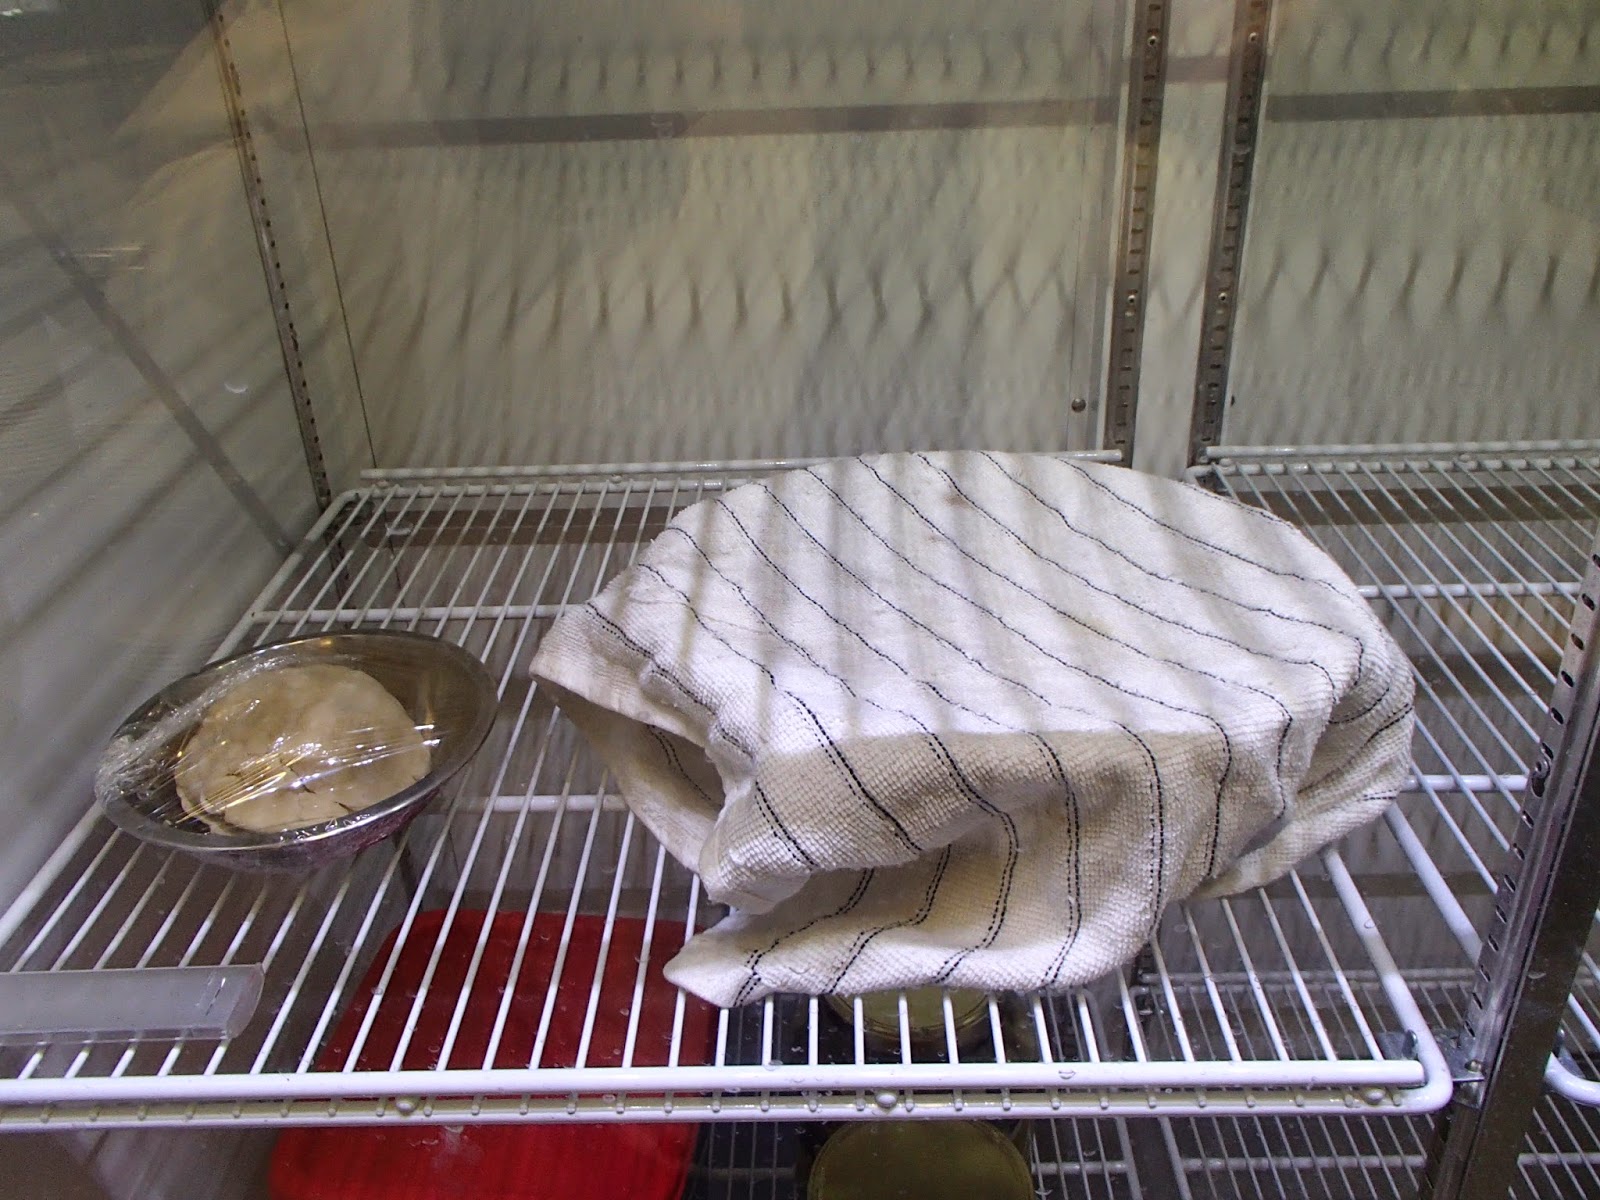 |
| Slowly fermenting at cold temperature for at least 14 hours. |
Covering the dough is important. This can be done using plastic wrap or a wet cloth. If this is not done, the dough will form a crust and will be harder to work in subsequent steps.
 |
| Beautiful bread dough ready to work again after cold fermentation. |
After cold fermentation, we take the dough out of the bowl and place it upside down on a floured surface (the dough will have developed a "skin" on the top and it is this "skin" which will be facing the floured surface). The bottom surface of the dough will be "wetter' and you can already start to see the creation of bubbles by the yeast which is now live.
At this point the entire dough ball can be used for a large bread or it can be cut or split in two for two medium sized loaves.
 |
| Splitting our dough to make two loaves. |
Once the dough is split, we once again deflate it and fold it four times before making another ball. We let these rest for 45 minutes (always covering our dough when letting it rise).
 |
| Getting ready to make two loaves. |
After, the dough has risen again, we shape our bread. We tend to just roll them out and "seal them" with the heal of our palms so that the seal becomes the underside of the bread.
 |
| Our shaped dough |
Once shaped, we allow the bread to rest again for an hour. Afterwhich, we use a sharp knife to cut a pattern on the surface of the bread (you can be quite creative at this point).
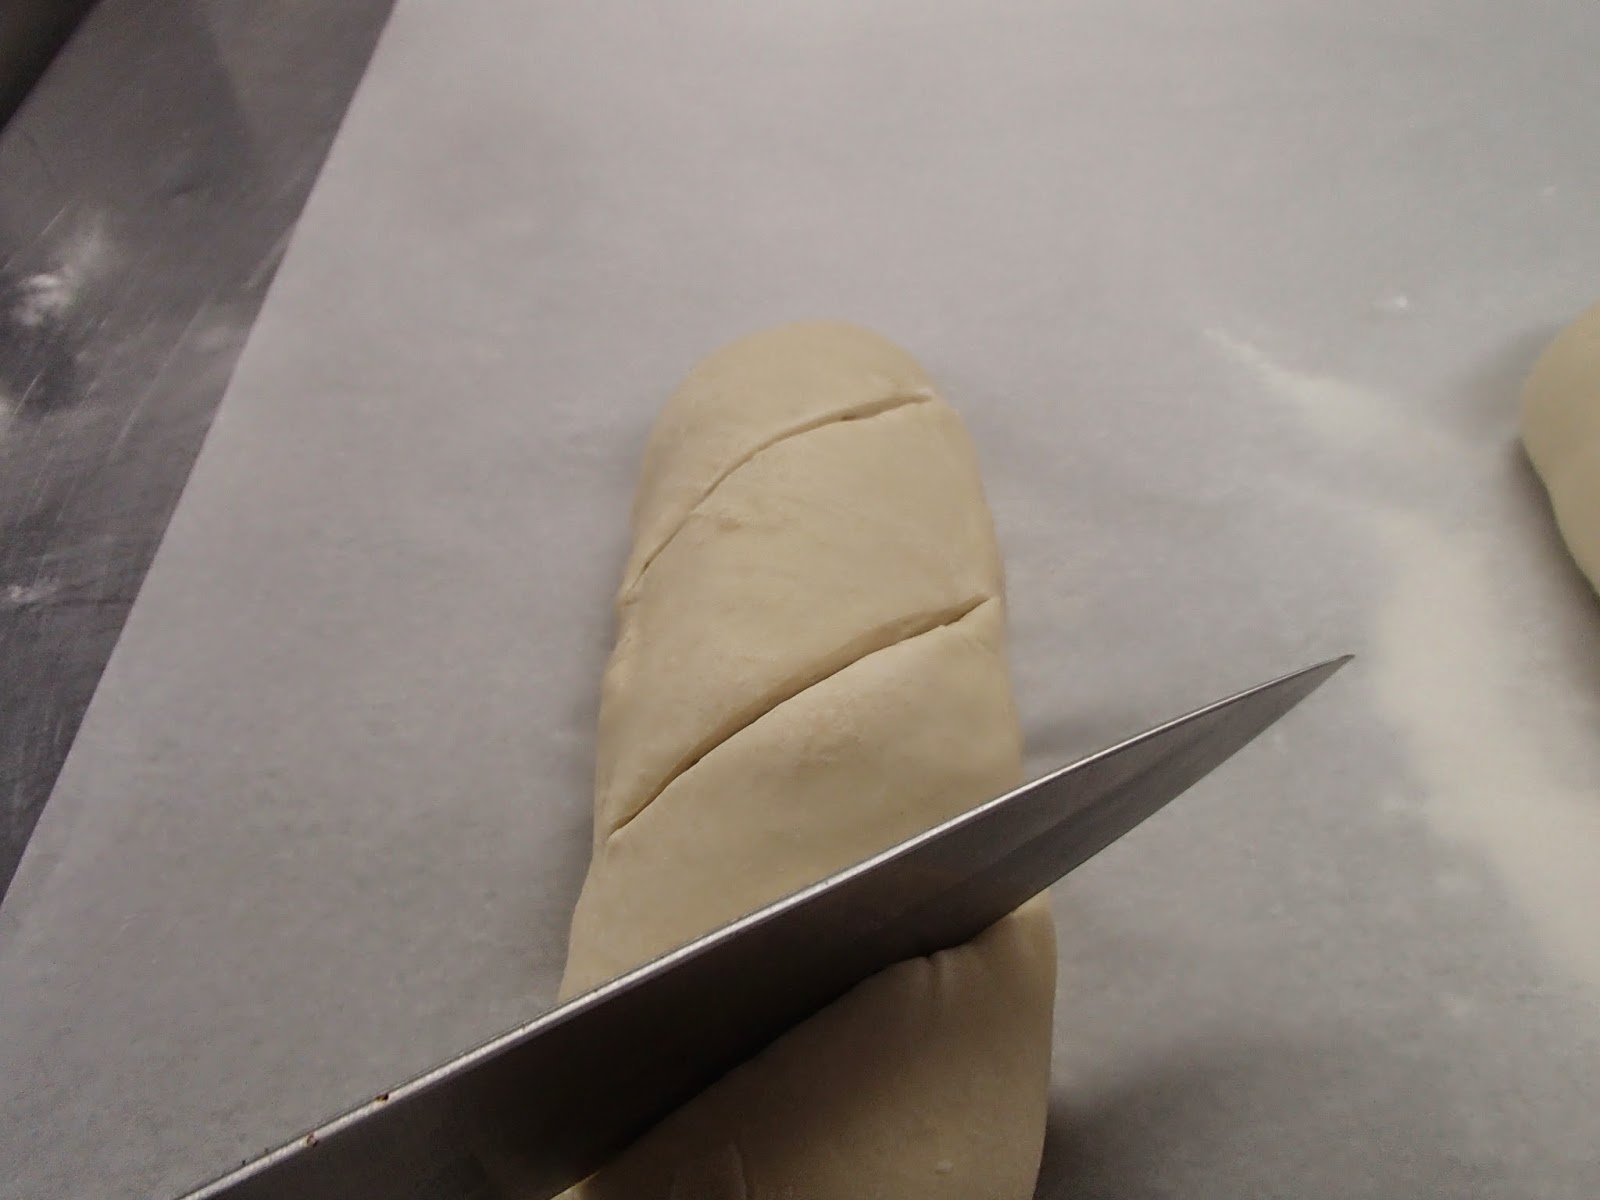 |
| Scarring the surface of the bread. |
We cook our bread in a pre-heated 500 F oven. However, it should be noted that we also pre-heat our baking sheet and we place our dough directly on this pre-heated sheet. This ensures a well-cooked and crispy underside.
In order to get a golden and crispy crust, we also use steam. In our Tea Room's professional oven, this is easy to introduce. At home, we actually put a water bath in the oven and when we are ready to bake the bread, we add ice cubes to the water bath.
The bread is usually done in 20 minutes. You will know the bread is done once you knock on the crust and hear a hollow sound.
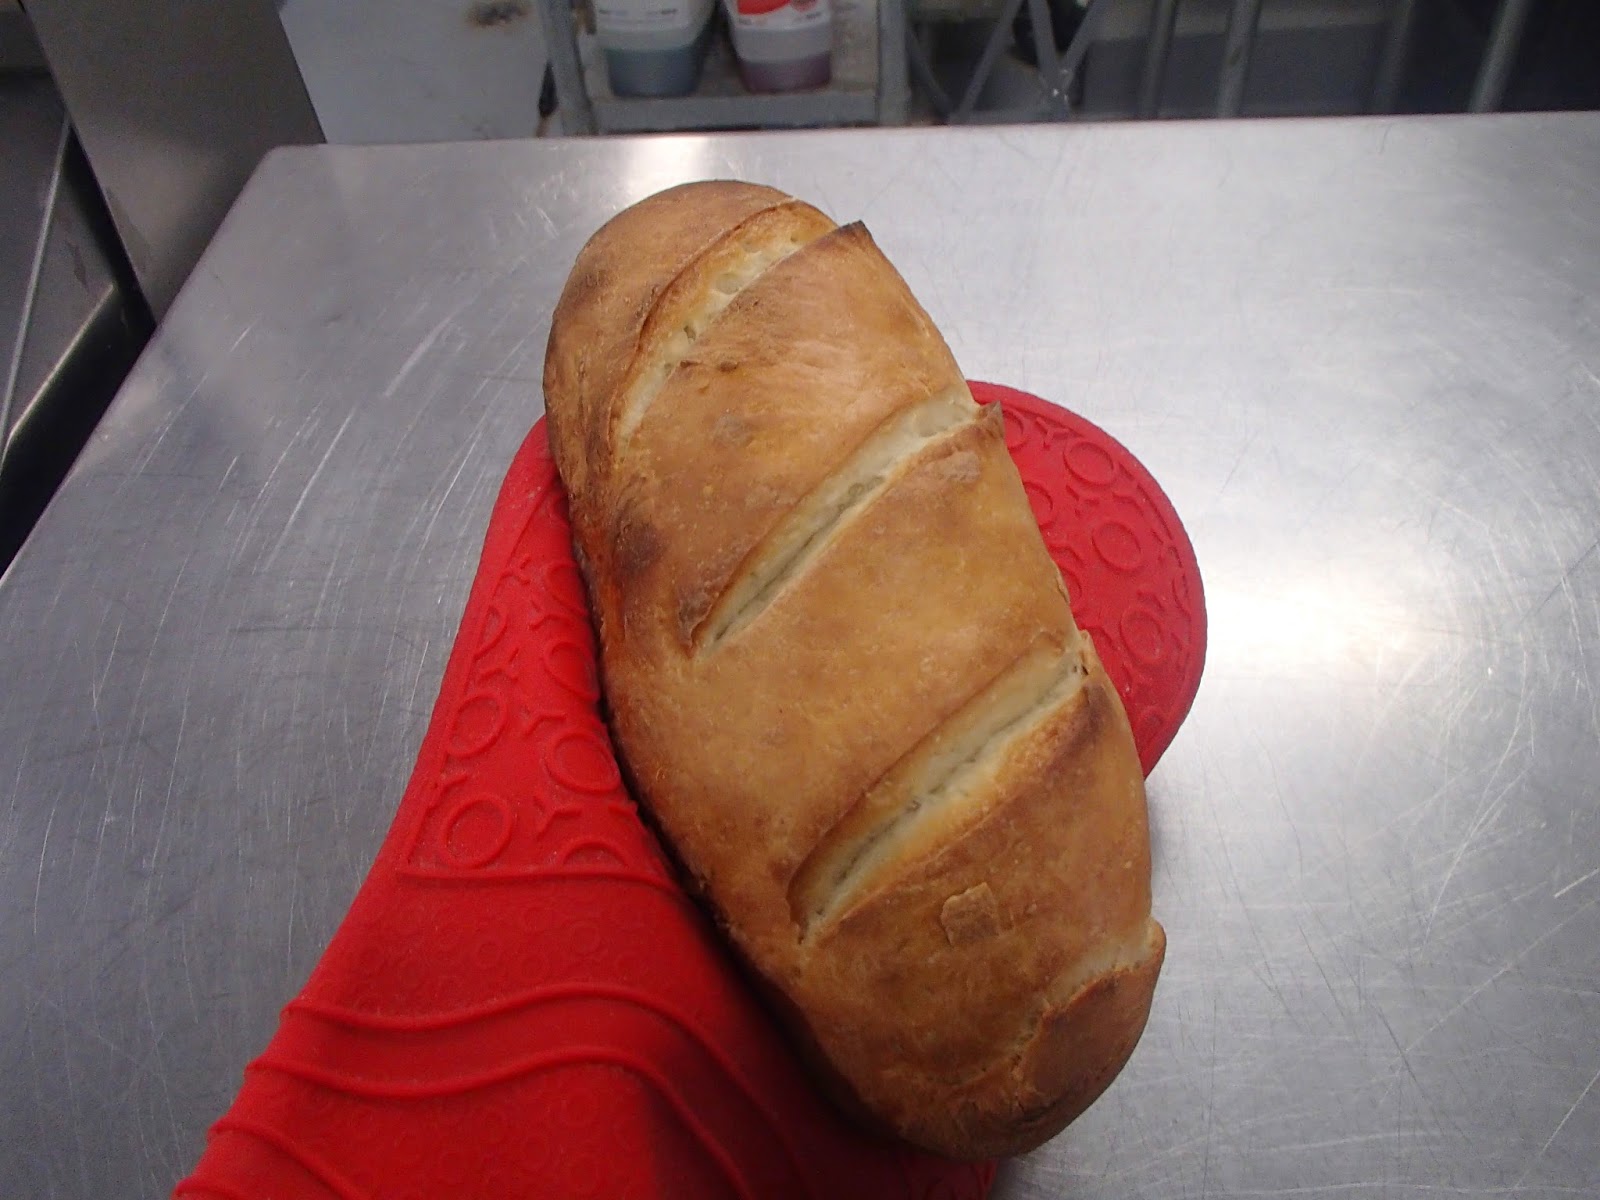 |
| Another nice loaf! |
As indicated earlier, making your own bread is really satisfying. Whenever we bake ours, I have to admit... it does not last a day!
We'll close this week, with another installment of new art glass from the gallery. This time, it is a pink irridescent and signed Loetz, circa 1910.
 |
| Loetz pink iridescent "elephant foot" vase. |


No comments:
Post a Comment